I recently got my hands on a Nikon Coolscan 2000 (LS-2000) scanner. The drivers and the scanning software VueScan is distributed by Hamrick Software. The original software Nikon Scan is discontinued. There maybe are ways to get it working on Windows 10 but I did not further investigate it after the first try.
The setup of the scanner and its drivers is described here.
Settings in VueScan
The goal of this guide it to get the data as raw as possible from the over 20 year old scanner. The scan quality is acceptable with 2700dpi and 12bit ADC resolution. The VueScan software has two stages: Scanning & Processing. We are interrested in the result of the Scanning stage as it does not include the filtering and color corrections we will later to on our own. The following table shows the settings which should be set in the Input tab of Vuescan:
| Setting | Value | Description |
|---|---|---|
| Media | B/W Negative | Not important for raw scanning. If you want to use the inverting of Vuescan this should be set to the type of media. |
| Bits per pixel | 64bit RGBI | As the Nikon scanner has a depth of 12bit we allow each channel (red, green, blue, infrared) to take 16bit. If you choose 16bit here for a single grey channel you can use Make gray from to decide how the grey channel should be created. As we do want to get as much data as possible we capture all 4 channels. |
| Scan resolution | 2700dpi | Choose the highest available value. |
| Lock exposure | Use this setting as described here and here. It makes scanning a film faster as no preview has to be taken. |
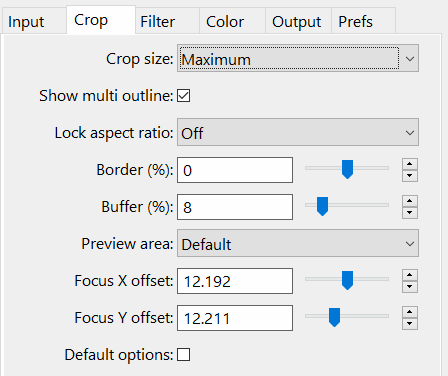
In the Crop tab set Crop size to “Maximum”. Also untick Auto offset and Auto rotate to make batch processing smaller.
The above settings control how the scanner does the scan. The next settings are resposible processing the scan.
Processing Settings
In the Filter tab untick everything. For B/W film the cleaning using the infrared channel also does not work as noted in this article:
Infrared cleaning does not work for traditional black and white negs; the metallic silver in them interferes with it.Using it may give weird tonality. It DOES work perfectly well on C-41 black and white films, like Ilford XP-2 and Kodak 400CN, so you can use it on them. It also works fine for C-41 color films and E-6 slides.
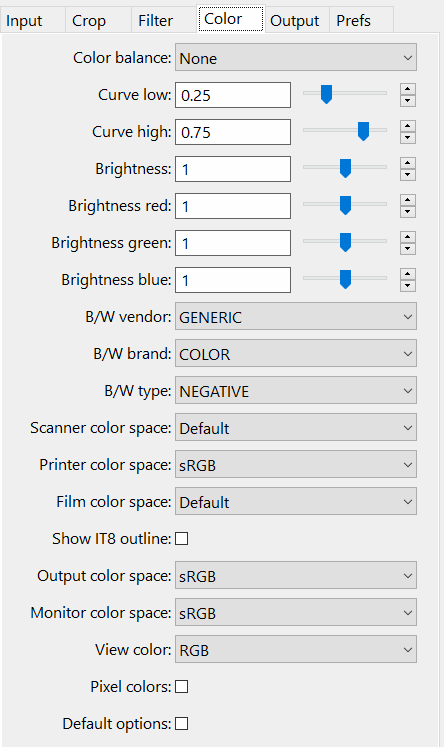
The settings in the Color can all be set to default values as the raw image will be saved before the color correction takes place during the Processing stage. The values there only affect the view of the scan in the right side bar of VueScan. If you use the Input | Lock film base color setting the color of the film will appear in this tab. You can also choose a film model which is close to yours to get a good preview of the result you can achieve from the raw output.
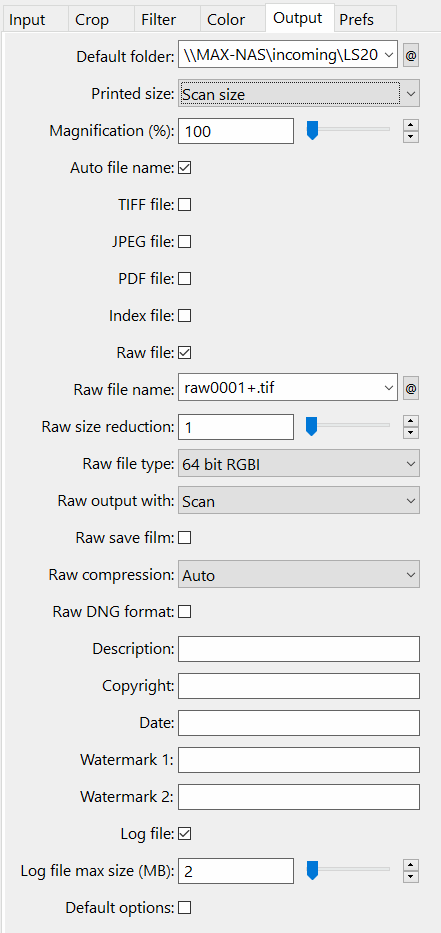
Outputting the Image Data
The scanner offers linear CCD (charge-coupled device) sensors for the red, green, blue and infrared channel. The Output tab allows to capture this raw data by ticking the setting RAW file. The TIFF file, JPEG file, PDF file and Index file options can be left unticked as the output in these formats is already color corrected by VueScan. Furthermore it is important to choose 64bit RGBI for Raw file type and “Scan” for Raw output with to output the scan just after the Scanning stage before the Processing stage. Make sure Raw save film is unticked such that the value of “Raw output with” is used.
The format of the RAW file output is TIFF. The usage of the DNG format with the setting Raw DNG format does not offer a benefit like described by Tim Gray in a forum:
The most ‘raw’ file format out of Vuescan is the RAW tiff file. Gamma 1, RGB data off the sensor, no color space attached. While the DNG RAW is nominally similar, programs don’t necessarily treat DNG files the same as TIFF files and might/probably do some adjustments before displaying data (changing gamma, etc.). DNG wasn’t really intended to be used for scanner data. TIFF is what you probably want; it’s not unintuitive to store multichannel data, RGB or RGBI in this case, with an arbitrary gamma, usually 1, 1.8, or 2.2, in a TIFF file - that’s what the format has been designed to do.
Tim also mentions that the gamma can be chosen arbitrarily when storing the RGBI data in the TIFF. It is important to know that if the “Raw file type” is greater than 8bit per channel the image gamma of the output file is 𝛾=1.0 as noted here. If you are unsure what this means read in the Cambridge in Color page what this means. This fact makes it neccassary to convert the color space of the raw TIFF in order to open it in a editor software like GIMP or Darktable.
My workflow for converting between the linear RGB image data to the sRGB color space uses the color management capabilities of ImageMagick:
1magick input.tif -set colorspace RGB -colorspace sRGB output.tif
This interprets the input as linear RGB and converts it to the sRGB color space by applying the correct gamma. You can also do this using an linear sRGB ICC profile (created with RawTherapee) in GIMP and then converting it to sRGB.
If you do not do this then you will have troubles with correcting the colors in the post-processing step. Without converting the color space (and therefore not adjusting the gamma) before importing the image into Darktable I was not able to adjust the details properly. The following example should demonstrate this. The negative is an overexposed example of a tree during a sunset.
The first image was post-processed without converting the color space. This means the image data was interpreted by Darktable as non-linear sRGB:
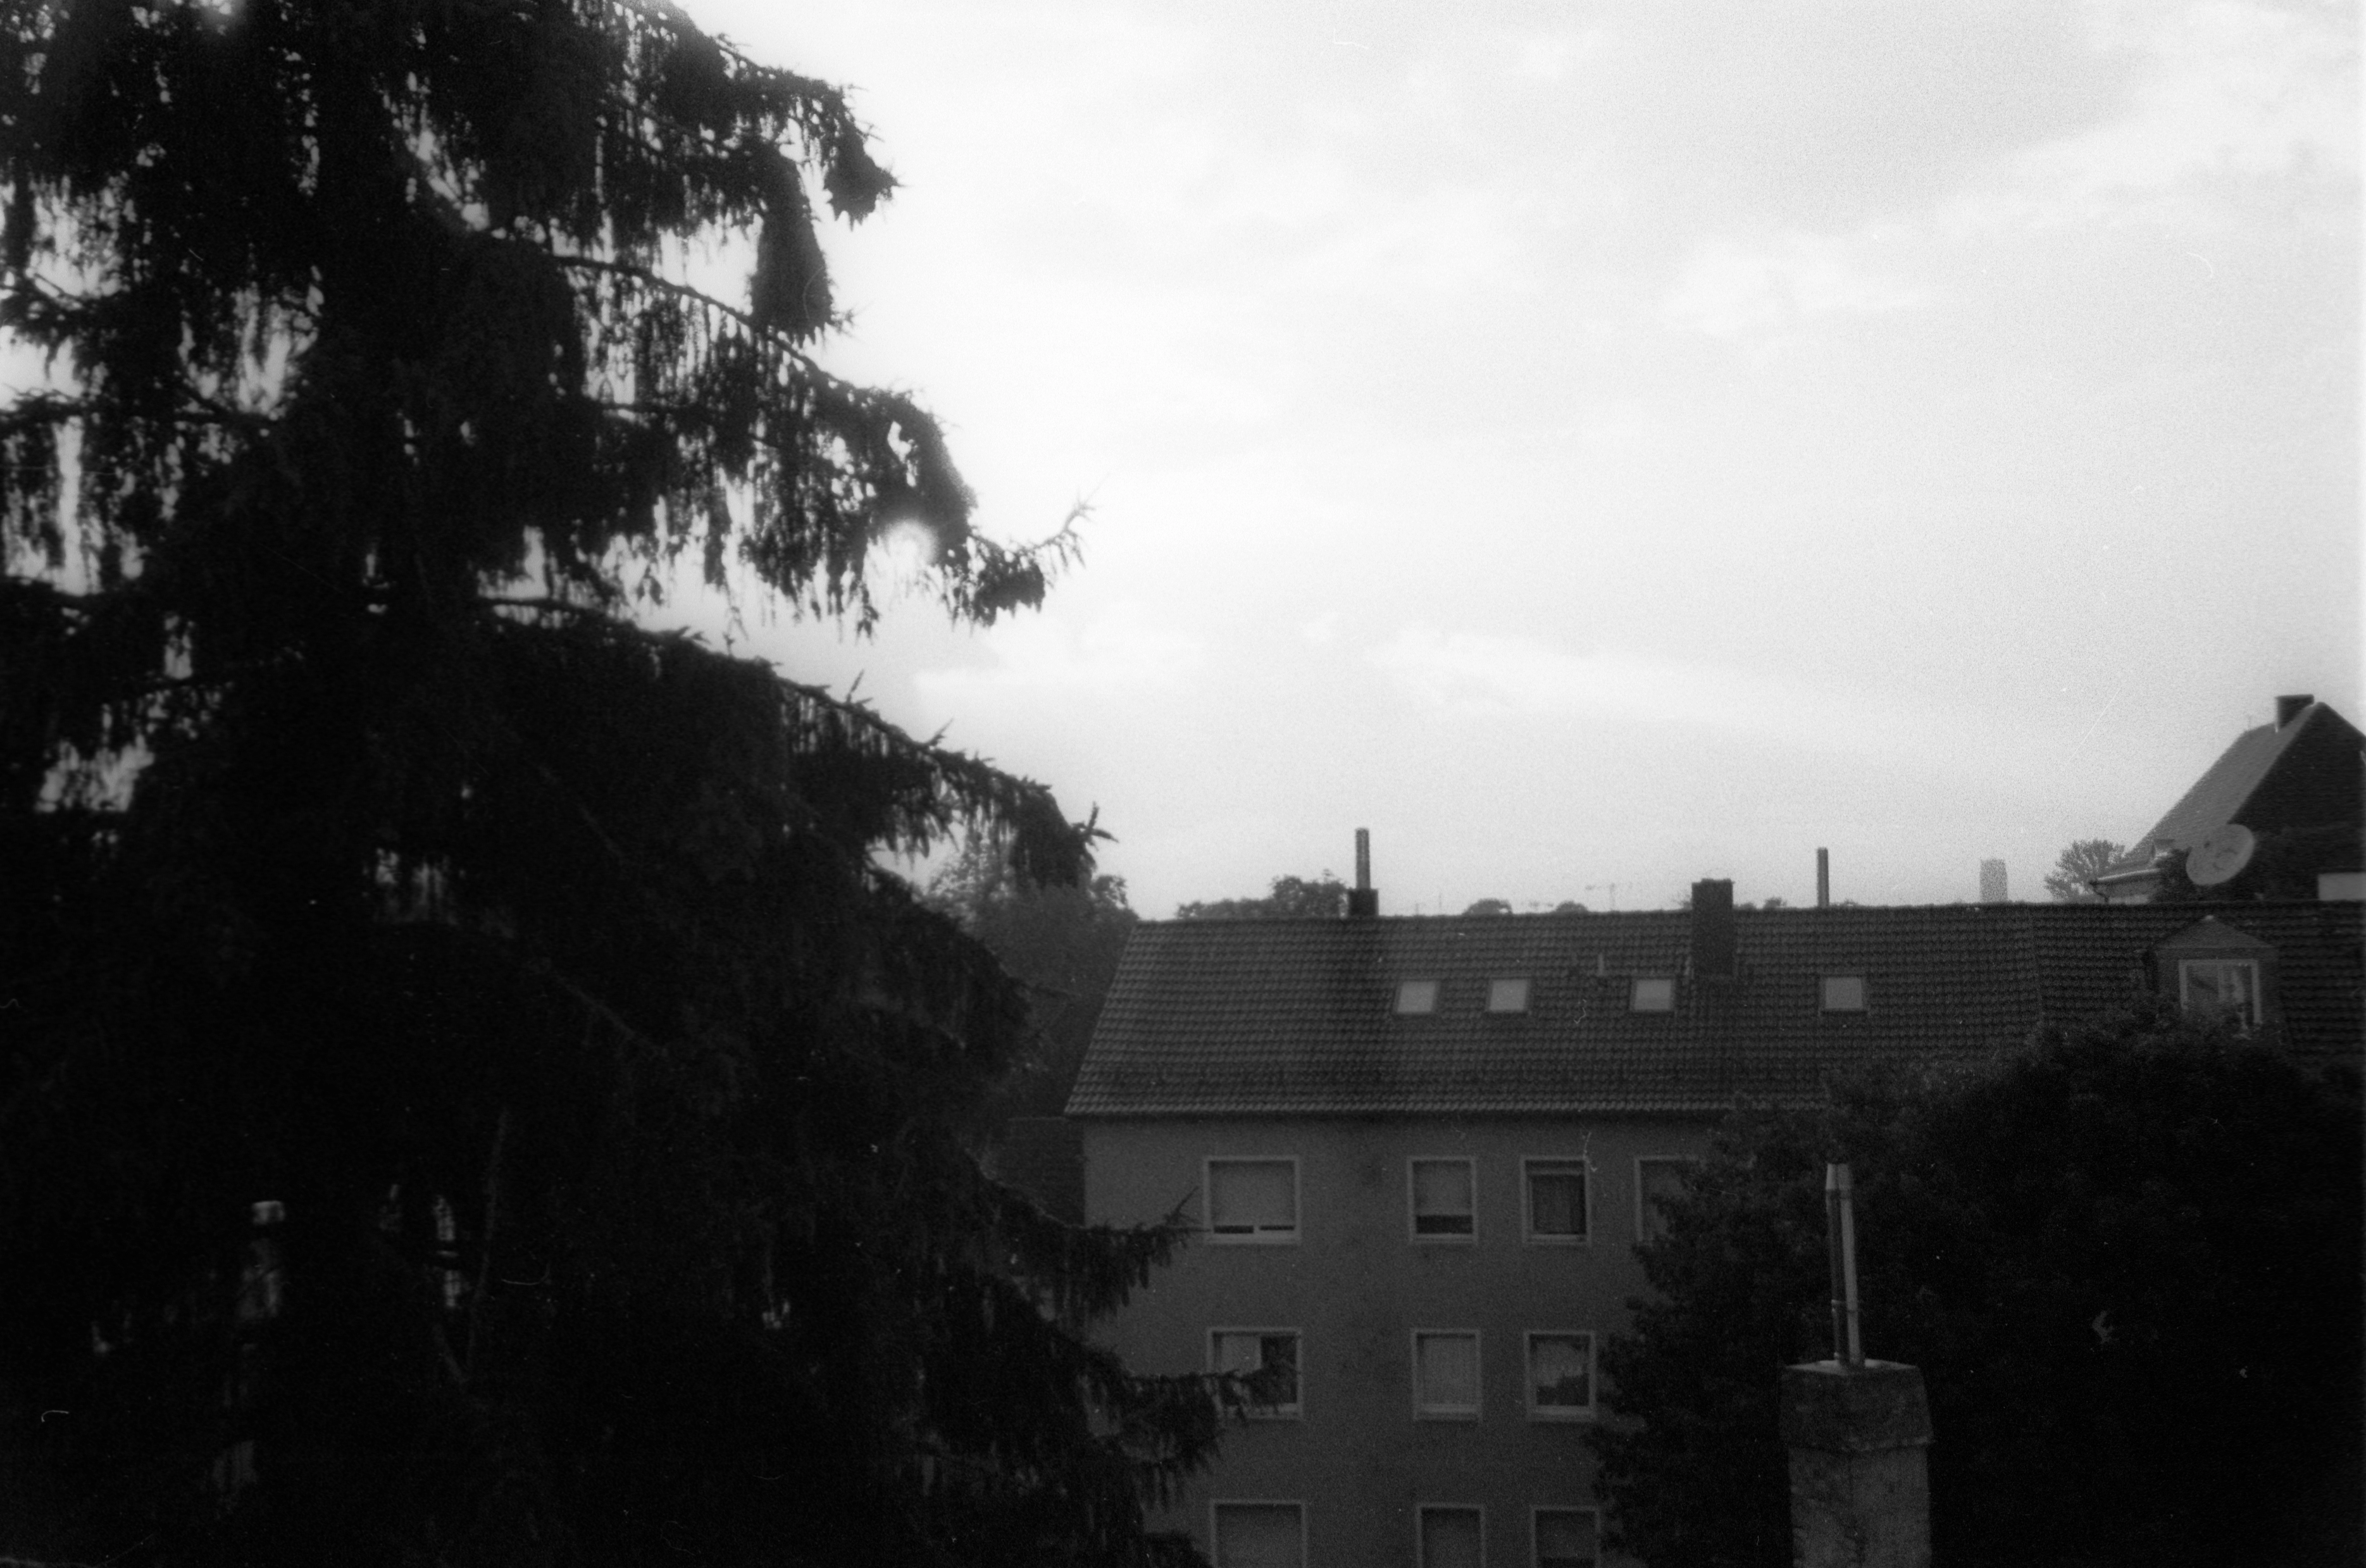
As you can see I was not able to make the clouds as visible as in the second example:
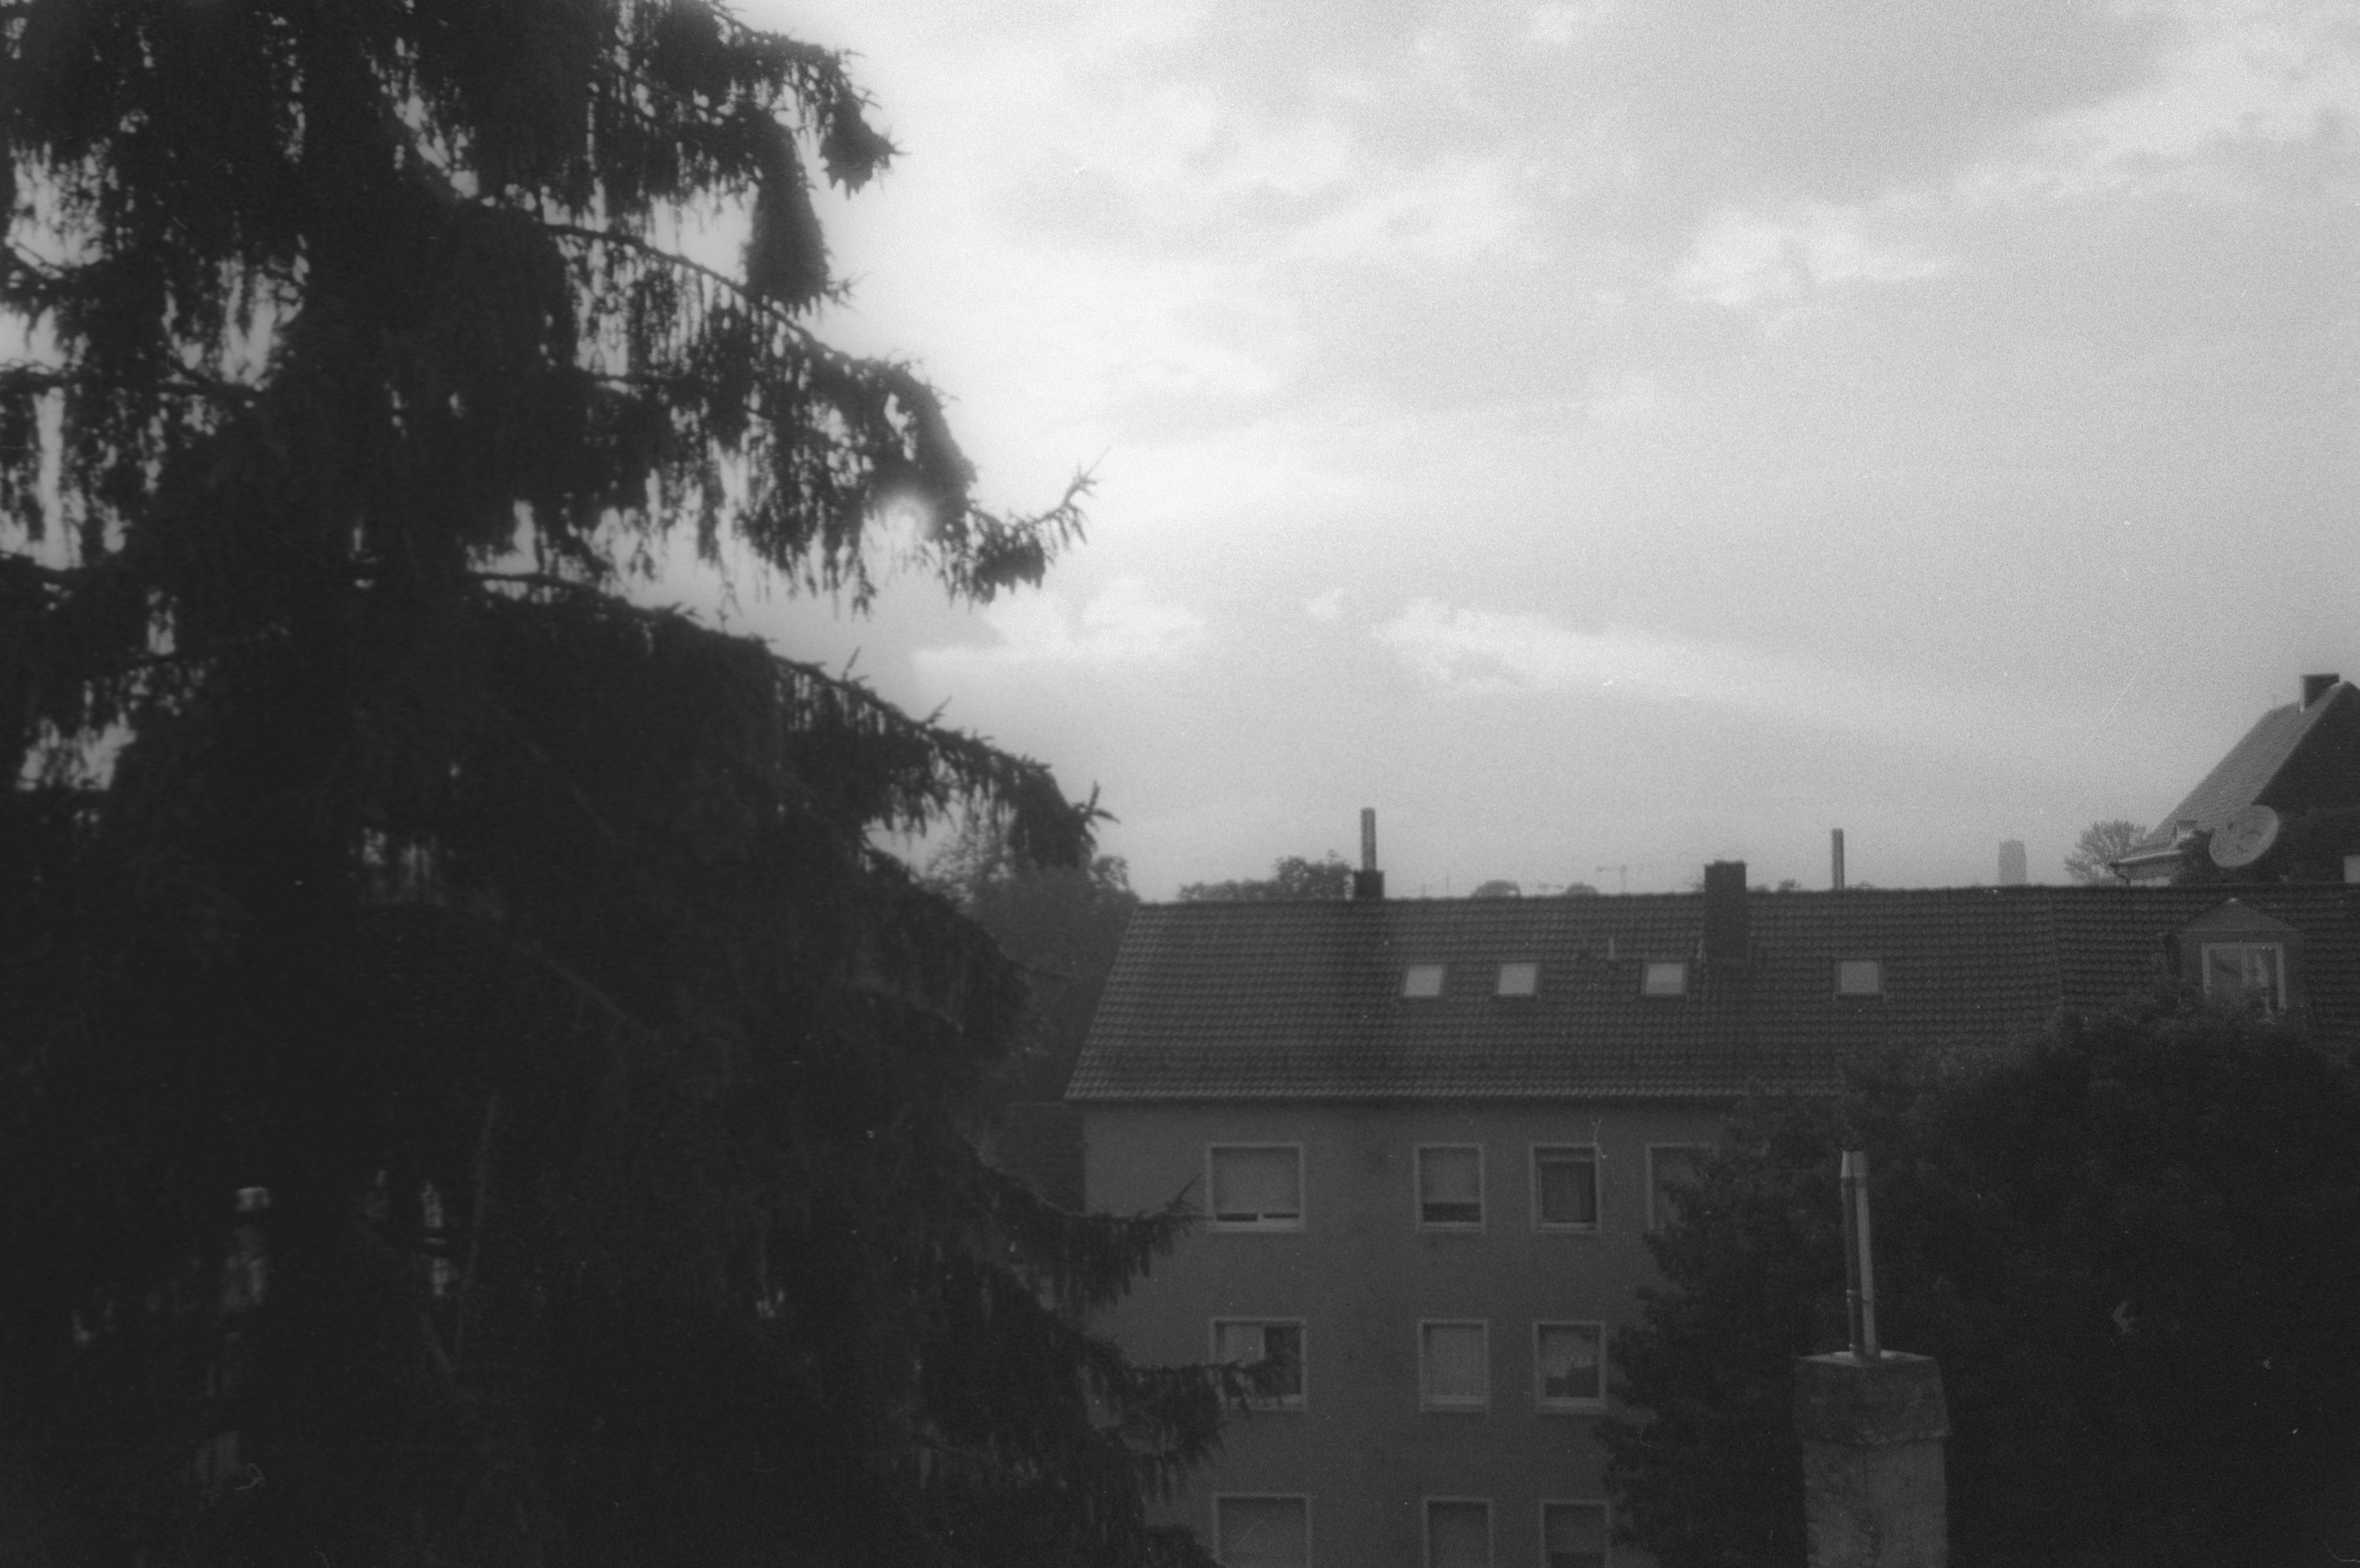
Maybe there is a hacky way around this. The proper way is to convert color spaces though. The image is not a good shot but should demonstrate the importance of the interpretation of the raw data.
Overview of settings
The following screenshots should give you an overview of the settings which are needed for raw scanning:
Input tab

Crop tab
Filter tab

Color tab
Output tab
Post-processing using Darktable
When importing a raw TIFF into Darktable make sure that the input color space is sRGB. The steps which are needed to process the raw data data are the following:
- Reduce the RGB (with infrared channel) to a single 16bit channel using the Darktable “channel mixer” module.
- Invert the image using the base curve or invert module. The invert module takes the color of the film into account. This is needed if the raw image has an orange color touch. This maybe can be reduced by the Red/Green/Blue analog gain settings which are not discussed here.
- Adjust the image using the base curve module or by adjusting the levels.
- Further modules which can help to adjust the image are “white balance”, “exposure” or “color balance”.
- Scratches or dust can be removed by using the “retouch” module.
There are already proposals for modules specific to film negative processing in the wiki. I’d love to see some of them implemented!
Thats it! Of course there is more to the post-processing, but as this is an subjective process I leave this open to artist.