I received a free Yubikey from an untrusted source on the CCCamp 2019. Therefore I looked for a way to verify its authenticity. The device appeared physically to be an original and not tampered with. A check whether the key was manufactured by Yubico seems like a sufficient way to make sure that the security key is an original.
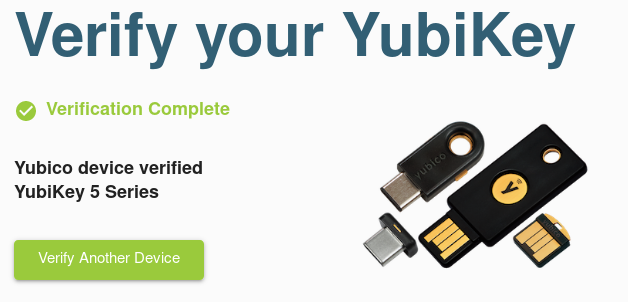
I found YubiKey Verification which successfully identified my Key as a Yubikey 5 NFC:

But there is no information on how this check works. As a security interrested person I digged a bit deeper on how to do this verification manually and found two ways.
PIV Attestation Method
As documented here the PIV standart allows to store private keys on the Yubikey. There is a factory-generated attestation key in slot f9. This key is signed by the Yubico PIV root certificate.
The yubico-piv-tool allows to retreive the certificate from the Yubikey.
 1> yubico-piv-tool -a read-certificate -s f9 > attestation.pem
 2> openssl x509 -in attestation.pem -noout -text
 3Certificate:
 4    Data:
 5        ...
 6        Issuer: CN = Yubico PIV Root CA Serial 263751
 7        Validity
 8            Not Before: Mar 14 00:00:00 2016 GMT
 9            Not After : Apr 17 00:00:00 2052 GMT
10        Subject: CN = Yubico PIV Attestation
11        ...
Next we will generate a key in slot 9a and write the public key to a file:
1> yubico-piv-tool -a generate -s 9a -A RSA2048 -k > 9a-key.pem
(The default PIN and management key can be found here)
Finally we can attest the new key using the key in f9:
1> yubico-piv-tool --action=attest --slot=9a > 9a-attest.pem
Finally we can create a certificate chain and verify it:
1> curl -O https://developers.yubico.com/PIV/Introduction/piv-attestation-ca.pem
2> cat piv-attestation-ca.pem attestation.pem > chain.pem
3> openssl verify -verbose -CAfile chain.pem 9a-attest.pem
49a-attest.pem: OK
This proves that the attestation key was generated by Yubico and that the attestation certificate is valid.
The 9a-attest.pem certificate contains the public key we previously stored in 9a-key.pem. The following shows the certificate:
 1> openssl x509 -in 9a-attest.pem -noout -text
 2Certificate:
 3    Data:
 4        ...
 5        Issuer: CN = Yubico PIV Attestation
 6        ...
 7        Subject: CN = YubiKey PIV Attestation 9a
 8        Subject Public Key Info:
 9            Public Key Algorithm: rsaEncryption
10                RSA Public-Key: (2048 bit)
11                Modulus:
12                    00:b3:5d:65:a6:3b:1b:97:5b:97:6a:c9:ec:1a:5b:
13                    d9:e5:30:16:56:b0:cd:84:f9:cb:d7:0f:90:e1:68:
14                    8d:fb:73:c4:09:fd:97:7c:10:8e:19:71:25:bb:a1:
15                    db:52:e7:ce:bc:28:f4:7d:d0:b5:b4:9a:68:e4:8a:
16                    ...
whereas the following shows the public key of slot 9a:
1> openssl rsa -inform PEM -pubin -in 9a-key.pem -text
2RSA Public-Key: (2048 bit)
3Modulus:
4    00:b3:5d:65:a6:3b:1b:97:5b:97:6a:c9:ec:1a:5b:
5    d9:e5:30:16:56:b0:cd:84:f9:cb:d7:0f:90:e1:68:
6    8d:fb:73:c4:09:fd:97:7c:10:8e:19:71:25:bb:a1:
7    db:52:e7:ce:bc:28:f4:7d:d0:b5:b4:9a:68:e4:8a:
8    ...
WebAuthn/U2F Method
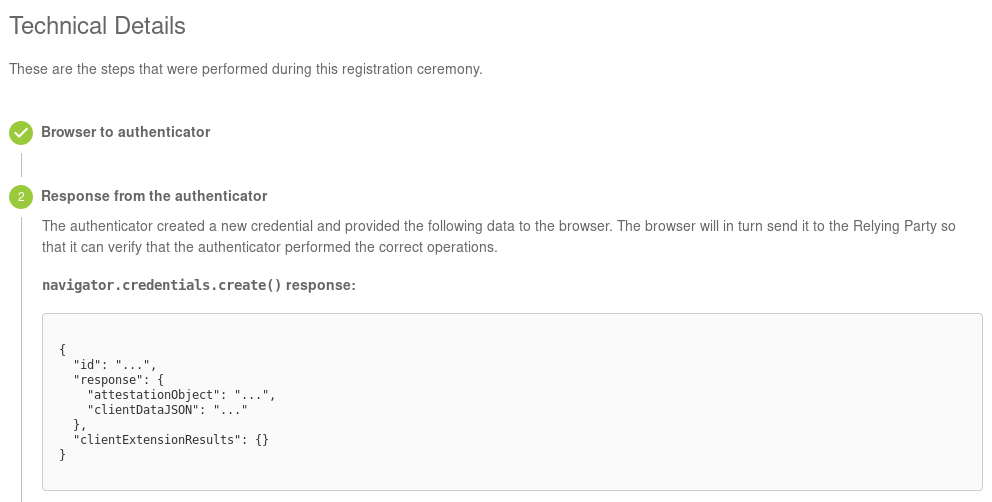
The next method goes a little bit deeper into how WebAuthn works internally. We start by getting a WebAuthn response from our Yubikey. Even tough there are probably cooler ways I just got it from the Yubikey WebAuthn demo site. After registering you key there you can get the response in the technical details:

Using the MIT licensed code by Ackermann Yuriy we are able to verify the signature ourselves. Props go to him for reading all those RFCs!
The following functions and imports are needed in order to get the data, signature and certificate used in the attestation in WebAuthn:
  1const crypto = require('crypto')
  2const base64url = require('base64url')
  3const cbor = require('cbor')
  4const jsrsasign = require('jsrsasign')
  5const fs = require('fs')
  6
  7let hash = (alg, message) => {
  8  return crypto.createHash(alg).update(message).digest()
  9}
 10
 11let base64ToPem = (b64cert) => {
 12  let pemcert = ''
 13  for (let i = 0; i < b64cert.length; i += 64)
 14    pemcert += b64cert.slice(i, i + 64) + '\n'
 15
 16  return '-----BEGIN CERTIFICATE-----\n' + pemcert + '-----END CERTIFICATE-----'
 17}
 18
 19const getCertificateInfo = (certificate) => {
 20  let subjectCert = new jsrsasign.X509()
 21  subjectCert.readCertPEM(certificate)
 22
 23  let subjectString = subjectCert.getSubjectString()
 24  let subjectParts = subjectString.slice(1).split('/')
 25
 26  let subject = {}
 27  for (let field of subjectParts) {
 28    let kv = field.split('=')
 29    subject[kv[0]] = kv[1]
 30  }
 31
 32  let version = subjectCert.version
 33  let basicConstraintsCA = !!subjectCert.getExtBasicConstraints().cA
 34
 35  return {
 36    subject, version, basicConstraintsCA
 37  }
 38}
 39
 40const parseAuthData = (buffer) => {
 41  let rpIdHash = buffer.slice(0, 32)
 42  buffer = buffer.slice(32)
 43  let flagsBuf = buffer.slice(0, 1)
 44  buffer = buffer.slice(1)
 45  let flagsInt = flagsBuf[0]
 46  let flags = {
 47    up: !!(flagsInt & 0x01),
 48    uv: !!(flagsInt & 0x04),
 49    at: !!(flagsInt & 0x40),
 50    ed: !!(flagsInt & 0x80),
 51    flagsInt
 52  }
 53
 54  let counterBuf = buffer.slice(0, 4)
 55  buffer = buffer.slice(4)
 56  let counter = counterBuf.readUInt32BE(0)
 57
 58  let aaguid = undefined
 59  let credID = undefined
 60  let COSEPublicKey = undefined
 61
 62  if (flags.at) {
 63    aaguid = buffer.slice(0, 16)
 64    buffer = buffer.slice(16)
 65    let credIDLenBuf = buffer.slice(0, 2)
 66    buffer = buffer.slice(2)
 67    let credIDLen = credIDLenBuf.readUInt16BE(0)
 68    credID = buffer.slice(0, credIDLen)
 69    buffer = buffer.slice(credIDLen)
 70    COSEPublicKey = buffer
 71  }
 72
 73  return {rpIdHash, flagsBuf, flags, counter, counterBuf, aaguid, credID, COSEPublicKey}
 74}
 75
 76let COSEECDHAtoPKCS = (COSEPublicKey) => {
 77  /*
 78     +------+-------+-------+---------+----------------------------------+
 79     | name | key   | label | type    | description                      |
 80     |      | type  |       |         |                                  |
 81     +------+-------+-------+---------+----------------------------------+
 82     | crv  | 2     | -1    | int /   | EC Curve identifier - Taken from |
 83     |      |       |       | tstr    | the COSE Curves registry         |
 84     |      |       |       |         |                                  |
 85     | x    | 2     | -2    | bstr    | X Coordinate                     |
 86     |      |       |       |         |                                  |
 87     | y    | 2     | -3    | bstr /  | Y Coordinate                     |
 88     |      |       |       | bool    |                                  |
 89     |      |       |       |         |                                  |
 90     | d    | 2     | -4    | bstr    | Private key                      |
 91     +------+-------+-------+---------+----------------------------------+
 92  */
 93
 94  let coseStruct = cbor.decodeAllSync(COSEPublicKey)[0]
 95  let tag = Buffer.from([0x04])
 96  let x = coseStruct.get(-2)
 97  let y = coseStruct.get(-3)
 98
 99  return Buffer.concat([tag, x, y])
100}
In order to verify this using openssl we first need to extract the data, its signature and the PEM certificate:
 1let attestationBuffer = base64url.toBuffer(webAuthnResponse.response.attestationObject)
 2let ctapMakeCredResp = cbor.decodeAllSync(attestationBuffer)[0]
 3let authrDataStruct = parseAuthData(ctapMakeCredResp.authData)
 4
 5if (!authrDataStruct.flags.up)
 6  throw new Error('User was NOT presented durring authentication!')
 7
 8let clientDataHash = hash('sha256', base64url.toBuffer(webAuthnResponse.response.clientDataJSON))
 9let reservedByte = Buffer.from([0x00])
10let publicKey = COSEECDHAtoPKCS(authrDataStruct.COSEPublicKey)
11let signatureBase = Buffer.concat([reservedByte, authrDataStruct.rpIdHash, clientDataHash, authrDataStruct.credID, publicKey])
12
13let PEMCertificate = base64ToPem(ctapMakeCredResp.attStmt.x5c[0].toString('base64'))
14
15let signature = ctapMakeCredResp.attStmt.sig
16
17const pemStream = fs.createWriteStream('certificate.pem')
18pemStream.write(PEMCertificate)
19pemStream.end()
20const signatureStream = fs.createWriteStream('signature.sig')
21signatureStream.write(signature)
22signatureStream.end()
23const dataStream = fs.createWriteStream('data')
24dataStream.write(signatureBase)
25dataStream.end()
We also need a root certificate by Yubico again which will be used to verify the chain:
1> curl -O https://developers.yubico.com/U2F/yubico-u2f-ca-certs.txt
2> openssl verify -verbose -CAfile yubico-u2f-ca-certs.txt certificate.pem
3certificate.pem: OK
The last step verifies the signature and whether the certificate.pem is actually used:
1> openssl x509 -pubkey -noout -in certificate.pem > certificate-raw.pem
2> openssl dgst -sha256 -verify certificate-raw.pem -signature signature.sig data
3Verified OK
Summary
I gave some insights on how attestation works on the Yubico and how it can be used to verify certificates in order to hopefully prove its genuity.